Pages

Saturday, June 19, 2010

We're Making Progress


Do you ever wonder if sometimes projects take on a life of their own? How does that happen? Well my front perennial flower bed is one of those projects! Since our house is only a block from the middle school and a on a direct path to that school, we decided that the best wall material would be preformed pavers along the sidewalk.


That way if any of the brainiacs that walk by decided that the wall looked like it could be walked on at least the pavers could take it more than the greystone rock we were building the rest of the flower bed walls with.


Of course we have creative ways in doing things in our household. Josh's method of leveling the pavers was to jump on them...not pretty looking but quite effective. Everyone in the house pitched in with Sean and Ian off loading brick pavers from the back of the truck, Josh laying the pavers, hubby had already cleared a few roots out of the way with the axe and of course, my job was to supervise and photograph the progression.


It didn't take too long before the wall was almost done. Less than an hour and most of that time was spent in the preparation of the area for the wall.


Of course there was much discussion as to how we were joining both the inside and outside walls together. Once we settled on the how to's, the wall was complete.


Gone were the ugly evergreen yews that had to be trimmed 2 times a year. Josh had removed them the week before. In their place was a beautiful new stone wall and a vision of what my new perennial bed would look like.


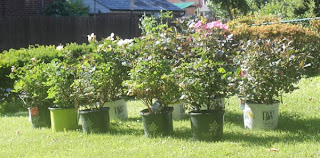
This past week I was able to begin planting some of the perennials that I purchased last week at The Perennial Farm along with some hybrid tea rose bushes that I had picked up at some of the local garden centers. We planted 6 fragrant rose bushes along the sidewalk side of the perennial bed. Some requirements for roses to make it in my bed, is that they not only have to be beautiful, they have to be very fragrant.


I planted some annual impatiens as well...you always need that pop of color that annuals always provide. We still need another truckload of dirt to finish filling n the bed and the old azaleas need to be removed and replaced with some newer ones.


As you can see, some of Mother Natures creatures are enjoying the perennial gardens plants. I love this echinecea...It's called White Swan and the flower head is huge. I have planted about 10 different echinecea varities...Can you tell that this is one of my favorite perennials?


I also planted a dwarf Bee Balm that we found at a local garden center. Isn't it pretty and the bumble bees have already visited it, so I think it was a nice addition to the bed.


This swallow tail butterfly really, really loves my echineceas. He spent the good part of the first day flitting from one plant to the other.

I'm hoping to finish the bed this coming week and I can share with you the whole project. One more truck load of dirt, some bush removal, some more planting to do, some mulching and we should be pretty much done. I can't wait!


Saturday, June 12, 2010

My Trip To The Perennial Farm


Today I got to take a trip to The Perennial Farm in nearby Glen Arm, MD. I can tell you that I have lived here in Maryland since 1982 and this farm has been a well kept secret. I never knew it existed and it's less than 10 miles from my house. How I found out about the farm is from my friend and neighbor Caroline. She also ripped out the old tired bushes from in front of her house last year and just got around to replacing some of them this year, hence her trip to the perennial farm for a few knock out roses.


Anyway, today wasn't the best weather day to go...it was humid, but the farm is only opened to the public on Saturdays from 8-4. So braving the humidity and 90 degree temperatures, Sean and I took a trip to see what we could find for my new perennial bed. I was delighted when I arrived to see all the greenhouses...61 to be exact! How this farm ever stays a secret is beyond me. It could be compared to a big elephant in a tiny room, but I guess when you are in the country with thousands of farmland acres around you, it's easy to hide in plain sight!


We checked into the office to get a map of where I could find the perennials I was looking for. Armed with my map, notes, catalog and cart, we made our way from one end of the farm to the and back.


Some of the perennials that I purchased were 3 types of coreopsis, astible, rudbeckia, 3 different echinaceas, gaura, gaillardia, and 2 different sedum. They were out of a few things that I wanted and I will try to purchase those at our local nursery center.


We even had to backtrack to the far end of the farm to get something that I had missed. Thankfully the perennial farm is very accomodating and allowed me to drive my car back there to collect the plants that I missed.


These echinaceas were some that I missed and I am sure glad that I went back for them. Not only are they gorgeous, 2 of them actually have a scent. They are part of the Big Sky series. If you like echineceas these are some must haves.


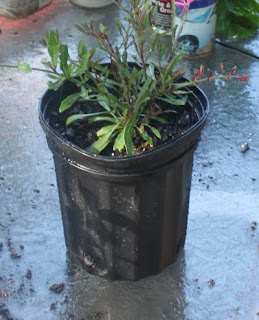
This gaura is going to be a challenge for me. It's not the hardiest of plants to winter over here in Maryland but boy is it gorgeous. Dark burgundy tinged foliage with fuschia flowers. Some of the information that was shared was to grow this on a sunny hillside as it doesn't like to be too wet. The grower thinks I should be ok with growing it in a raised bed....hope he's right as I bought one there and had already purchased 2 others elsewhere. Can you tell how much I love this plant?


Another favorite of mine are sedum. There are so many different varities and I hope to keep adding to my collection.


Anyone that grows perennials will tell you that they will periodically need to be seperated. The clumps just seem to multiply. One of the easiest perennials to seperate are hostas. They root pretty quickly and are fun to share with friends and neighbors. This is the area that I keep newly divided perennials...not too sunny, not too shaded...just right.


Some echineceas that I purchased from the local nursery....can you tell this is another favorite of mine. Right now I think I have 6 different varieties. Maybe I'll get them all.


I purchased these heather plants for around the pond area. They didn't look so good when I saved them from the local Home Depot. They weren't getting enough sun and water. Hopefully they will enjoy their new home once they are planted.


Some more gaillardia and delphinimums that I purchased at the local Home Depot. We managed to get a truck load of dirt so far and hope this next week to get at least 2 more. Then I can have some fun planting all my new periennials. Can't wait to share with you the final pictures.


Sunday, June 6, 2010

Yummo.....S'mores Bars


Who says you can only eat s'mores around a campfire? Here's a recipe that's sure to make your family happy. Mine can barely wait til the pan is cool enough to dig in. I can't take credit for the recipe as I got it from someone else on the internet a few years back but thought I would pass it on. So if you find yourself hankering for some s'mores, whip up a bunch.

S'mores Bars

3/4c butter
1 egg
2/3 c sugar
1 tsp vanilla
½ tsp salt
3½c small marshmallows
½c flour
18 whole graham crackers (crushed)
8 milk chocolate bars (1½ oz size)

Beat butter and sugar until fluffy. Beat in egg and vanilla. Add flour and salt. Stir in crushed graham crackers reserving 1 cup. Mix. Press mixture into bottom of a greased pan. Arrange chocolate bars in a layer over top graham cracker mixture. Sprinkle marshmallows. Sprinkle reserved crushed graham crackers over marshmallows. Bake 25-30 minutes @350 or until golden brown. Cool in pan on wire rack 10 min. Cut into bars. Cool completely.


Saturday, June 5, 2010

Be Sure To Hurry Over to The Rusty Thimble


Brenda of The Rusty Thimble is having a great giveaway for June. Be sure to hurry over and enter as she's drawing the winning name out on June 15. Sure looks like some wonderful prims just for entering...don't know about you but I sure love to be the winner.

Pond Building 101


This picture is how we ended after our first day of wall construction. Josh was completely worn out from moving and placing the rock in just the right place. Building a stone wall may not look like it's a lot of work but it is. The stone have to fit sort like a puzzle next to and on top of each other.


We decided to go with a pre-formed pond as oppose to a site built one. Too many problems exist with a site built pond and since we weren't having a huge pond, the pre-formed one fit the bill.

My birthday day, Josh was renewed with vigor, so he set out to dig the 2 foot deep area the pond needed. A few hours and many root removals later, the pond insert fit.


Time to backfill around the pound, making sure it was level. Thank goodness for strong youthful backs!


With the pond in place,the rest of the wall could be built. Then came the waterfall construction. Or should I say frustration!


Josh built, tore apart, rebuilt the waterfall so many times that day. Trying to get the water to fall just right from one stone to the next can be tricky.


After trying and trying again Josh has given up temporarily. Hopefully he is thinking out his next plan of attack. The hubby says that he will help him with the design later this afternoon, so hopefully there will be a successful waterfall. We even have our first visitor to our pond, a small tree frog. Wish I could get a picture of him but he's about the size of a quarter and blends in too well with the pond right now.

One of the things we did get accomplished was to ring our front street tree with a stone retaining wall. I planted some impatiens and transplanted some hostas in the new bed. I think it looks rather lovely.


Thursday, June 3, 2010

Check Out Painting Thyme Needfuls Great Giveaway


Be sure to stop by Painting Thyme Needfuls blog. Lynn is having a wonderful summer themed giveaway in honor of reaching 300 followers. Hurry as the winners name will be drawn out on June 21st. I sure am hoping that I am the lucky winner.

Wednesday, June 2, 2010

My New Flower Bed Day 1


A year ago, I decided to remove the old tired looking shrubs that were in the front of our house. I don't know what held me back from doing it sooner...well that's not quite truthful, I do know. We didn't intend to be living in this house too long, so we did nothing for the first 5 years. Whether we live in this house for another 5 years or 5 months, I decided it was time to do something that I would enjoy.


Who knew it would take another year before the foundation bed would get planted. The delay was mostly due to the selection of shrubs that we wanted being unavailable until this spring again. So when hubby and I stopped at the nursery 5 weeks ago and they had what we wanted we purchased the shrubs. Then came the looking at stone for the bed walls. We looked at a few different ones and ended up with a colonial grey stone. So now it was just finding the time. Well this past weekend was perfect. Hubby and the boys got caught up on all their lawn service lawns and had Sunday free. So off we went to buy the stone. Couldn't buy it before we were ready to use it as the darn pallet of stone weighs 1500 pounds and it has to be loaded off one piece at a time.


Anyway, we brought the shrubs from the backyard where they have been patiently waited to be planted and began to lay down the stone.


The boys worked on laying out the wall and made some pretty good progress on Sunday. They got both the top tier and the second tier along the front of the porch built.


Instead of building the wall all the way up from the ground in the back with my expensive wall stone, we used cinder blocks as the foundation. Once the dirt is back filled in, you'll never know the difference. Work had to end because we were at the point where it was getting dark and were where the pond needed to go....yep, we putting in fish pond too. Really it was the hubby's idea to put in a fish pond. Of course there was much discussion on what kind of fish pond we were putting in...whether it was going to be built from scratch or a preformed one. I'll post more tomorrow on pond building 101 tomorrow!